Here are the high-level steps required to build your own BruControl brew system:
- Plan your build – determine the type of system, the physical hardware, etc. For example, number of vessels, heating method, temperature probes, switches, sensors, pumps, power requirements, etc. Consider general supporting electrical components like contactors/relays, circuit/fuse breakers, power distribution blocks, power supplies, wires, terminals, plugs & receptacles, etc.
- Select an appropriate micro-controller interface and determine how it will connect to BruControl (via USB, Ethernet, or WiFi). See ‘Interface Considerations’ in the User Manual.
- Source your components and build it. Use your own schematic, or follow our examples. Wire interface inputs and outputs according to the ‘Interface Wiring Map‘ for your selected interface. WARNING: working with high voltage electrical circuits requires appropriate knowledge and skills!
- Install the BruControl application on a PC with Windows 7 or higher (XP or Vista may work but is not supported). Purchase a BruControl license suited to your application. Activate the license in BruControl under Settings… License.
- Download firmware for your micro-controller interface. Connect the interface to the PC via USB and install the appropriate firmware version into your interface using the included utility.
- Connect to your interface in BruControl under Settings… Interface.
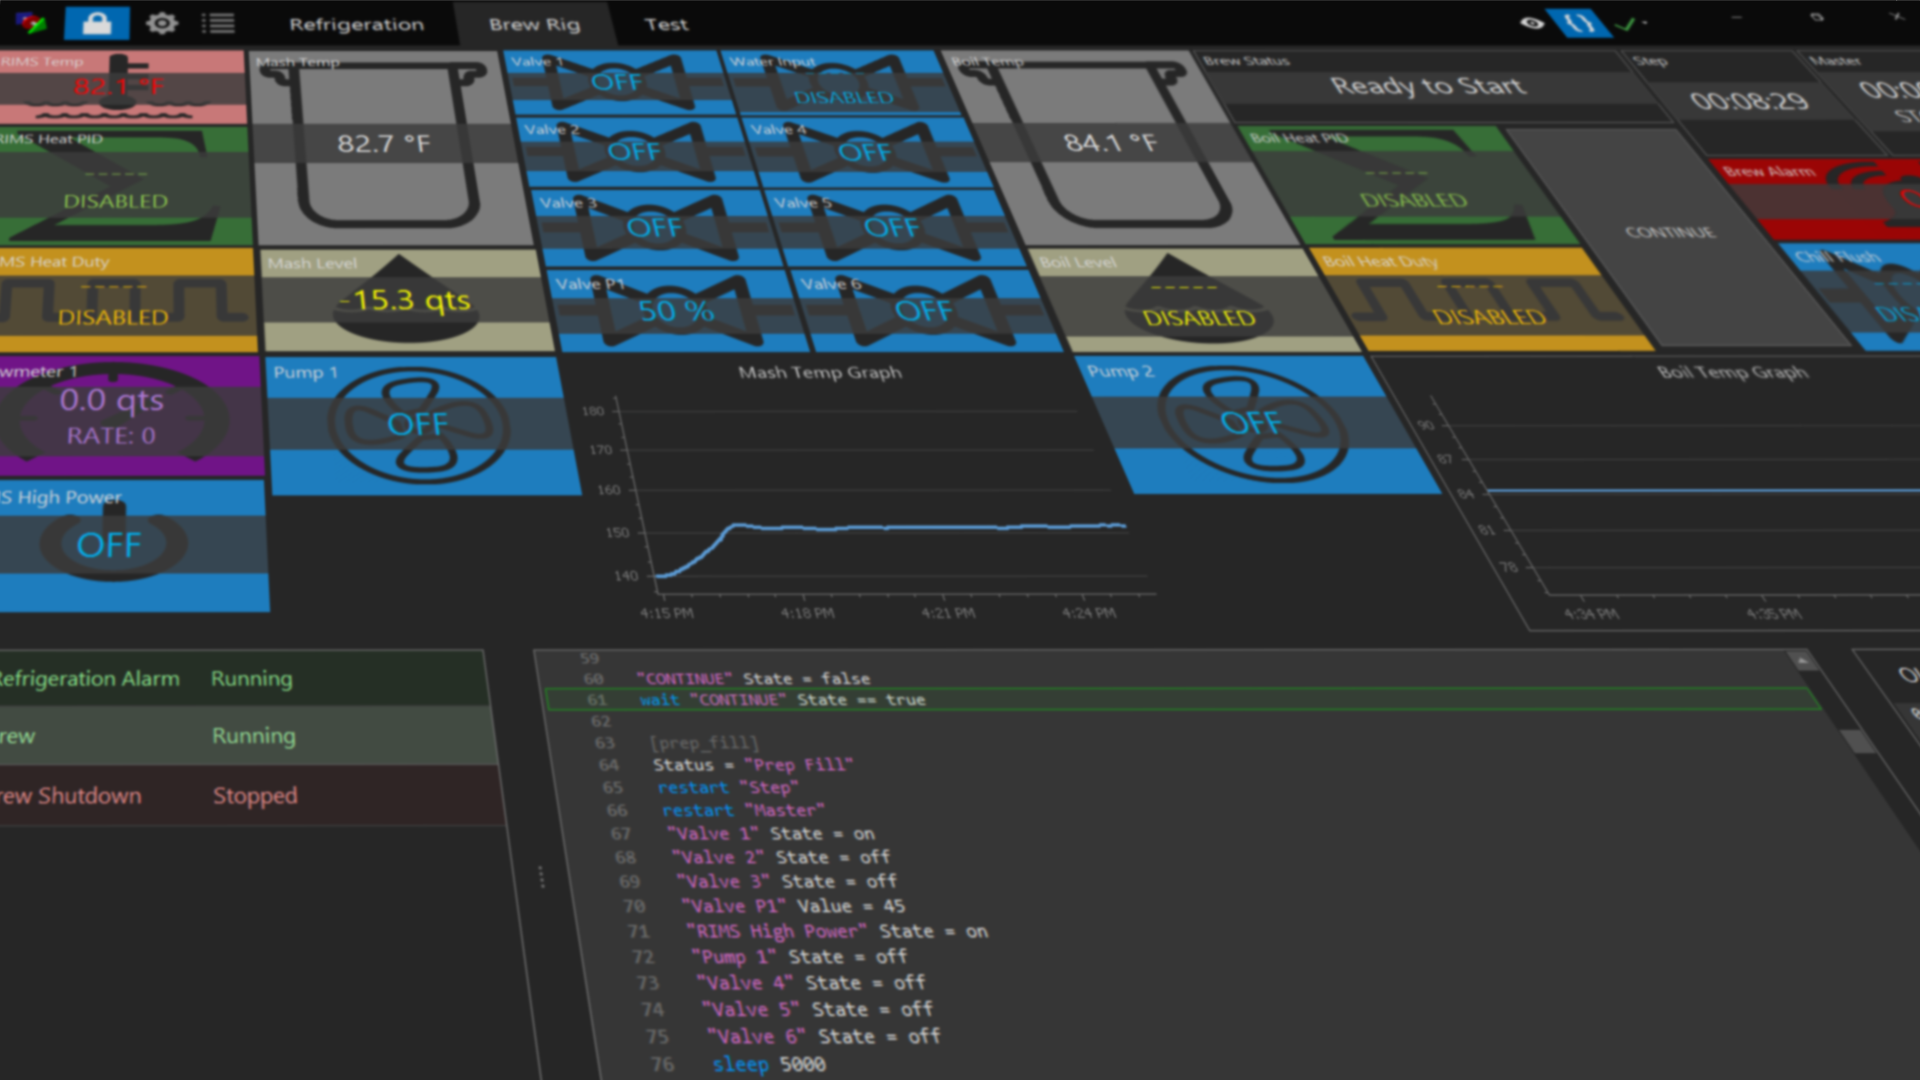
- Create device elements to support your hardware, according to the wiring of the ‘Interface Wiring Map’. Create timers, alarms, graphs, buttons, switches, etc. as needed. Configure and customize them to suit your application.
- Have fun brewing!
